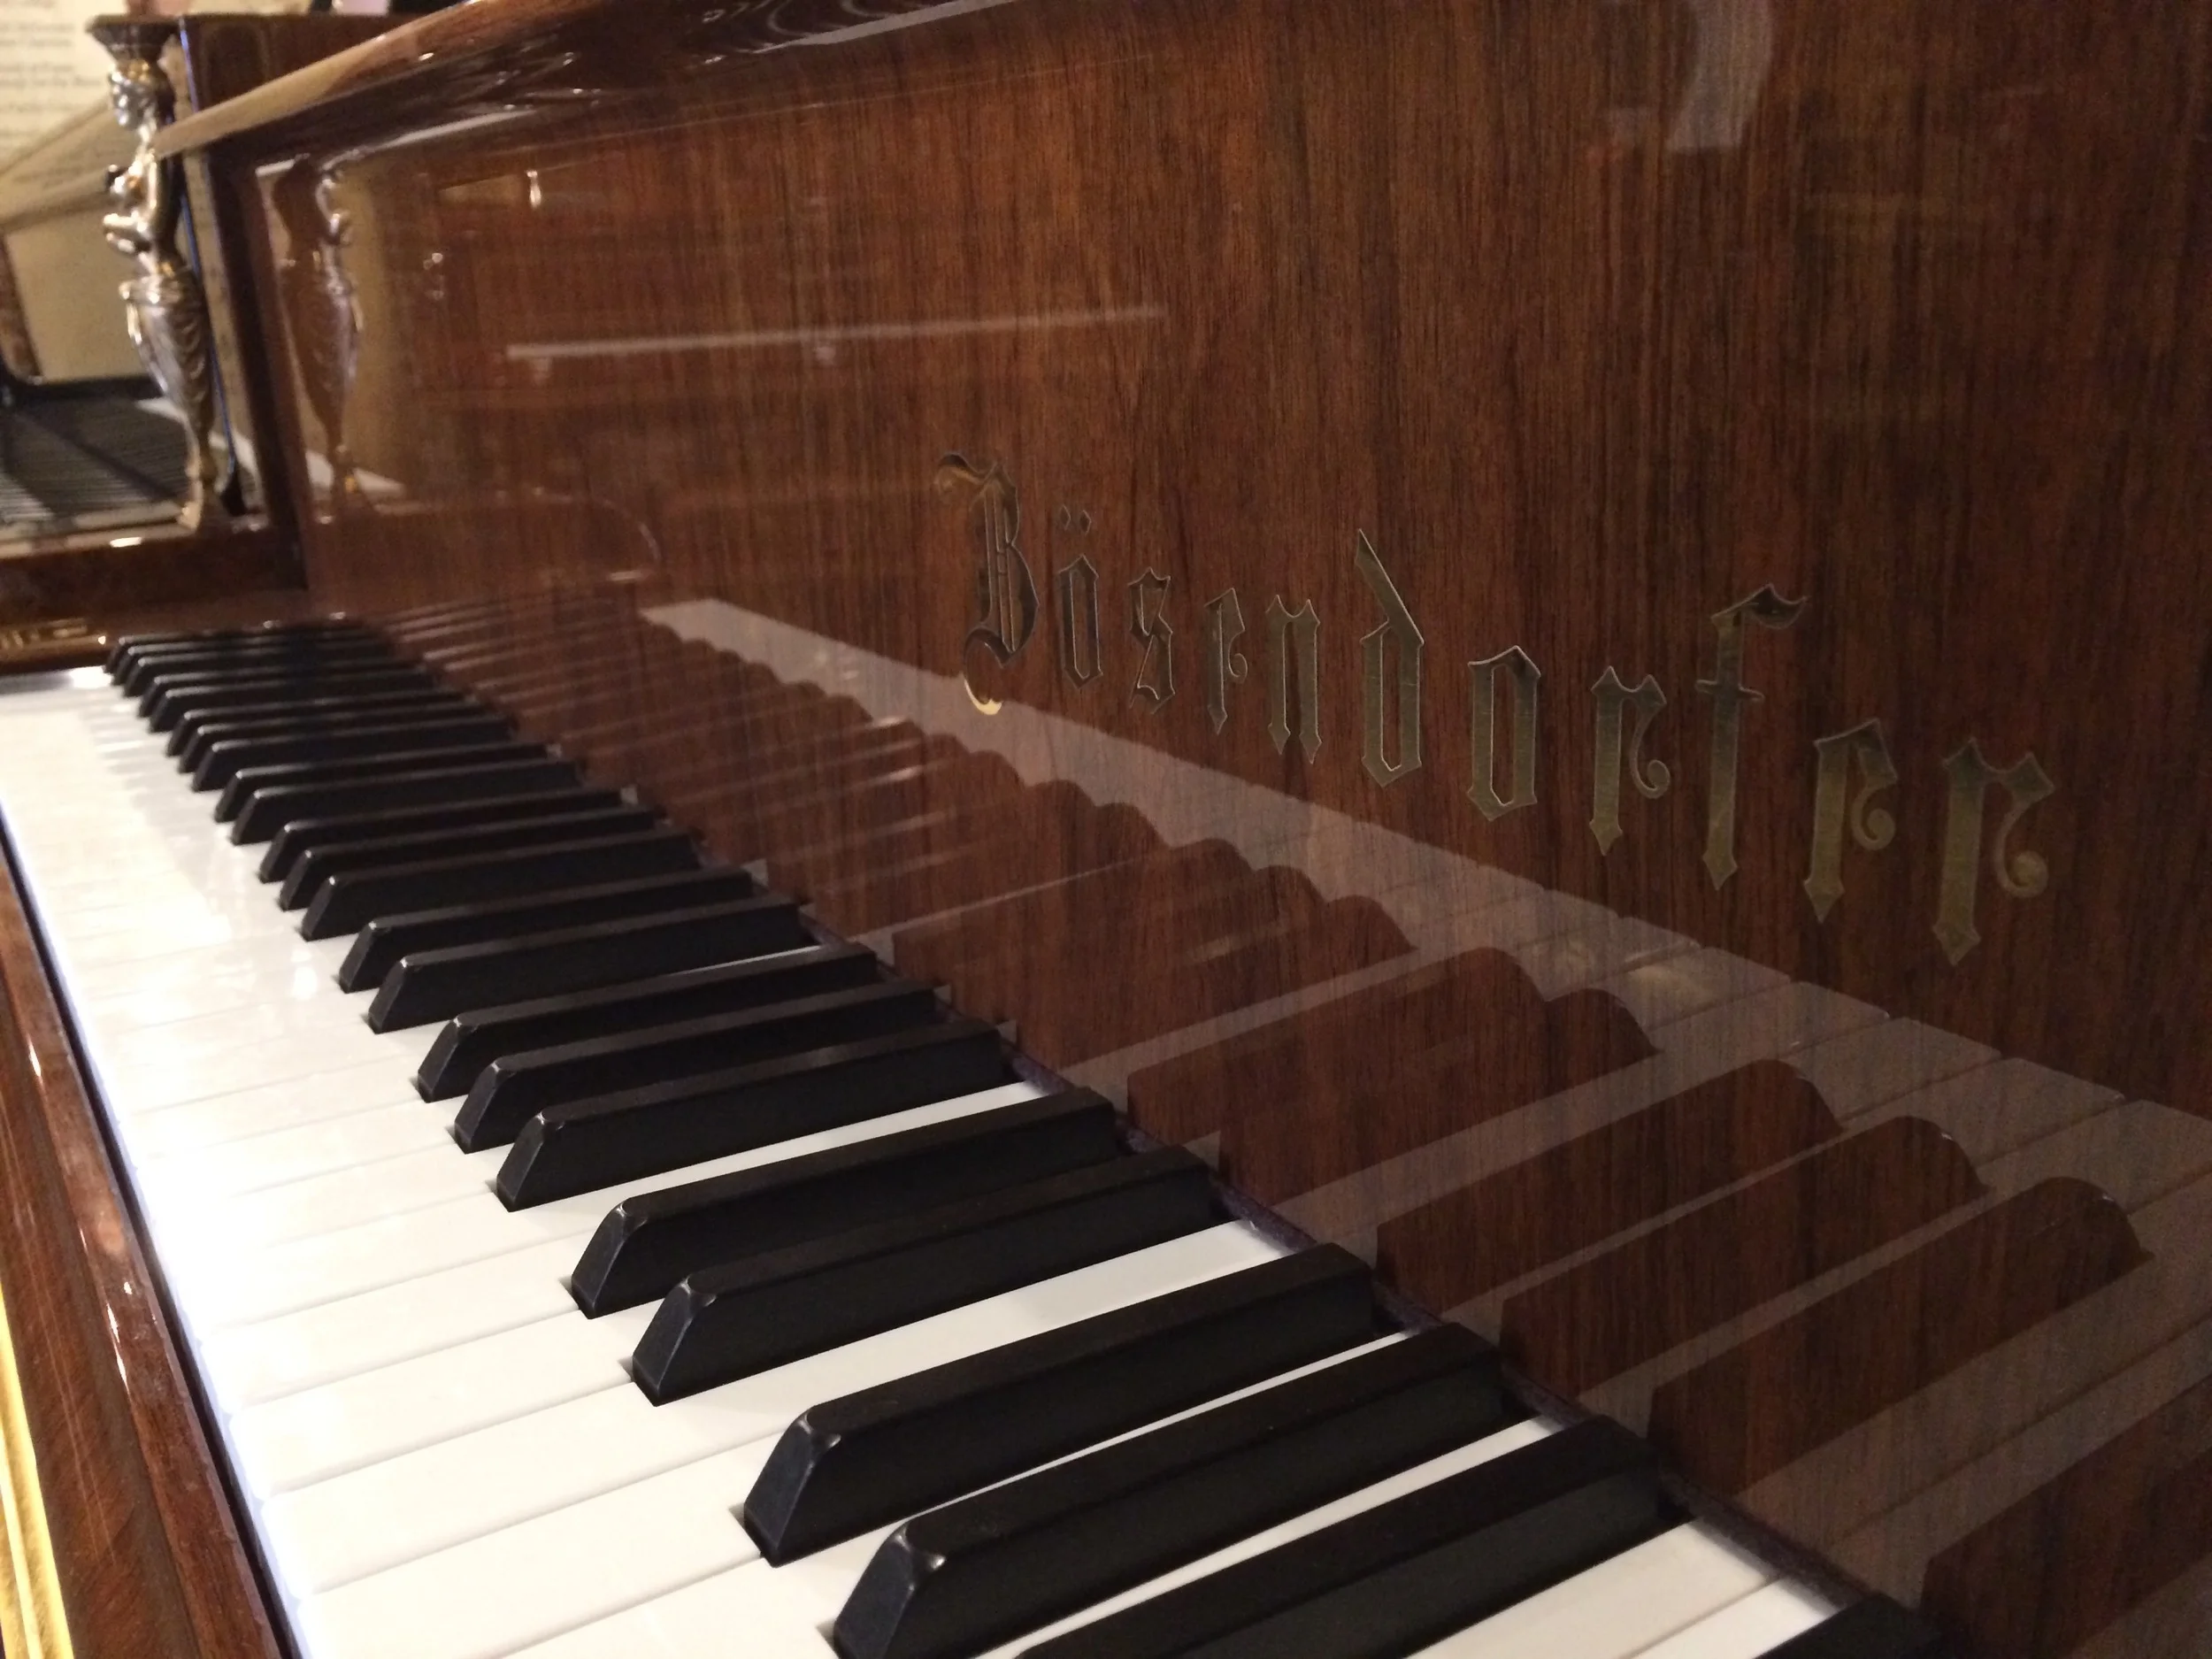
The Bösendorfer "Opus" #50000

Extravagance comes with no price tag.  The only way someone would want such an exorbitant "thing" would be for the esthetic, or potentially to add to a collection.  Like a fine piece of art, or say a '60's Ferrari California ($2.5m!), these things are simply out of the common person's reach financially.  They say many things, but modesty is not one of them.  

Take this piano shown below, Bösendorfer's "Opus" grand piano, the 50,000th piano that they have made.  This truly is a piece of art, gilded in all sorts of gold leaf and intricately perfected wooden inlays.  The mind wonders why such a thing exists in a world rife with poverty and struggle? Let us take a closer look at this "touring" piano.

The "Opus" grand

Do not be mistaken, Bösendorfer is one of, if not arguably the greatest piano maker still in production today.  The company has been around for 185 years (being the main reason for the creation of this art-case), and continues to craft an instrument that uses woodworking and engineering technology that surpasses almost every other brand.  It is some of the highest quality craftsmanship, and still, after all these years, has made a piano that comes straight from the crate in the closest one can get to pianistic perfection. Bösendorfer only manufactures about 200 pianos each year, which is minuscule compared to Yamaha's ~200,000.

The fallboard with what looks to be an Oscar at the end of the keys.

The fallboard with what looks to be an Oscar at the end of the keys.

These opulent things that one can only dream of having, continue to show us one truth; that there can always be something better to strive for, there will always be a "next level" to achieve, and greatness only comes to those who persevere.  This piano shows us the progress Bösendorfer and potentially pianos have made, and it does so in the most ridiculously lavish way possible.

This statue and the one that bookends the keys is made of 24 carat gold.

The inlay of the lyre on the side of the piano.

The lyre itself.

The logo on the plate.

The cast iron plate, which is entirely covered with goldleaf.

The name tag is also made of 24 carat gold.

I could go on about how much I do appreciate Bösendorfer and how I love the sound of their instruments... though, it is difficult to justify such an expensive piece ($750,000).  There are more expensive pianos in existence, however.  The Steinway Alma Tadema (a Steinway model "D") has the price tag of $1.2 million, for example...

My opening argument may seem against such riches, and it still stands, but if these pieces are still going to be made, why not enjoy them while one can? Also, if you're looking to buy a 3/4 of a million dollar piano, come to Classic Pianos before this goes back on tour.  I'd like to meet you and know what someone who has "whatever" money is like!

Links:

Bösendorfer "Opus" Unveiling

The Bösendorfer 50,000


Steinway "M" Bass String Replacement

Sometimes bass strings on even the greatest pianos die.  Sometimes they're dead after years of performance, neglect, water damage, or they could even come dead from the factory.

No, the latter does not happen very often, if ever, but with this particular project in January/February of 2014, it was true on an out-of-the-box Steinway at Portland State Univeristy.

 Maybe through shipping, it was exposed to something in particular, or maybe it just slipped quality control at the factory, but one thing was certain; for such an esteemed music program, those strings needed to be replaced.

Lincoln Hall at Portland State Univeristy

There's something to a music department at a school that makes the skin ripple with energy.  It's most likely the amount of creativity flowing through the halls, and the sound of music being heard at every turn, be it vocal or otherwise.  The room where the "M" was found had a trio practicing.  As they completed their session, we were pleased to hear some intricate baroque flow through the door.

The "M" of PSU

Since this was my first time replacing so many strings on a piano, the procedure was headed by my colleague Scott Peterson (whom has helped rebuild many pianos in the past which involves a full restringing).  He claimed he could have completed the task himself, but to have help, the process would only take upwards of five hours.

First we had to take the action out and cut all of the old bass strings.  One can see them with the action in the photo below.

The "M"s Action, Old Strings, and Tool Bag

All of the Bass Strings Removed and the Start of Replacement

As one can see below, the new strings come bound by wire, which helps keep them in order.  It would be incredibly time consuming to just have them flailing individually.  Also, notice the blue packing blanket draped over the cast iron plate.  That's for the protection of the pristine plate, the other treble strings below it, and especially the ebony satin finish of the piano's case.  These bass strings are of a very heavy gauge, and the their hardened steel can scratch almost anything, and even cut through one's skin. Thick gloves are a necessity, as is eye protection.

New Steinway Specific Strings

Aiding Scott

After the five hours of installation, the bass strings need to be "chipped" to a respectful tune, then tuned again, and a third time, for stability.  It is also recommended to have it tuned a fourth or even fifth time after a few weeks just so the steel and copper can stretch to pitch in their new environment.  Environment is of the utmost importance for pianos.

After it was all said and done, Scott left me to tune the Steiwnay.  Upon a full tuning, there was a blaring mistake, and it wasn't our fault, but the string manufacturer's! The seventh new bass string was dead! Oh the joys of the piano world.  Once you complete a job, well, it's honestly never done.

Tuning the "M"

Regardless, a new D#1 (the seventh bass string) was ordered, and I was sent back to Portland State University for its replacement.  Without Scott's guiding knowledge, I was undoubtedly a bit nervous, but after five hours straight of string replacement, I actually had a knack for it.  Below is a video showing the difference in sound between a dead string and a live, or simply a working string.  I threw another tuning on the piano, and the job was complete.

After replacing a whole set of dead bass strings for a brand new Steinway M, there was also a dead bass string in the new bunch. This video shows the sound of the dead string versus the brand new.

Mason & Hamlin model A (1971)

"The Model A is widely considered to be the world's best grand piano under 6 feet.
Although it's Mason & Hamlin's smallest grand piano, the Model A has an enormous volume and tone that are comparable to instruments of much greater size. With Mason & Hamlin's patented Tension Resonator and other design innovations, the Model A is perfect for professional studios, conservatories and other institutions, yet just as suitable for the home."

 -Mason & Hamlin

This is the Mason & Hamlin model A that I regulated and tuned this past week! 

The A's cabinet. (By the way, that's Walt Disney's sister Ruth's player piano in the background...)

The A's action before any work was completed.

As was mentioned when I wrote about the Steinway K52 (see below), the first major steps to preparation and regulation of any piano starts with a good cleaning of the whole case (here already completed by a colleague and close friend Jorge Barrios) and of the action itself.  Below, one can see that both the "stack" or action and keys have been removed from the keyframe.  Then, it gets vacuumed.

Vacuuming the keyframe.

McLube for the glides on the underside, and for the front rail/center rail key pins.

Next is the bedding of the keyframe.  This is where, with the stack placed and screwed down (sans keys), and the keyframe is slid back into the case.  Bedding is crucial in having a secure "bed" for the pianos keys to be played upon.  If the keyframe is not bedded correctly, there will be some quite obnoxious knocking of the keyframe to the keybed.  

To make sure that doesn't happen, a common practice is used, where slips of paper are arranged beneath the glides of the keyframe (see below).  Then, as one tightens or loosens the glides, the correct amount of pressure upon said pieces of paper can be felt as one slides them back and forth underneath the glides.  This process takes a bit to get down, but it is critical in creating a secure foundation for the keyframe to the keybed.

Bedding the keyframe.

After the frame is bedded, the keys need to be leveled and squared.  This is the same process as the upright, but it involves using key weights on the backchecks to represent the weight of the stack when it's resting upon the keys.

Key weights used for leveling keys.

Key weights are on.

The unleveled keys.

The leveled keys. 

The next process involves working on the grand action itself.  The first step is to rub Teflon on the knuckles of the hammers with a smaller hammer.

The stack upright.

The stack, ready for Teflon.

The Teflon powder.

Using a hammer to rub the Teflon powder in.

Next is the process of shaving the hammers. Below is the gist of what happens during this process.  The first photo shows those grooves where the hammers hit the piano strings.  This causes the piano to sound brighter over time, as the felt of the hammer gets compacted more and more with each note that is played.  Hammer shaping helps voice the piano to a less harsh tone, and creates a fresh surface to hit the piano strings with.

These grooves need to be eradicated! 

Shaping hammers and wearing a mask... the dust contains so much stuff!

The aftermath of hammer shaping.

Fresh hammers!

Next, I'll be lining up the hammers so that they all are equidistant from the strikepoint on the piano strings.  Below you can see how uneven they are... and how level they can be!

An uneven hammer-line.

The process of leveling the hammer-line.

Next is a lengthy process of regulating the action within the piano case.  This includes regulating let-off, drop, dip, and the backchecks.  These next few steps are quite tough to photograph, so I'll just show the magical tool which is the one pictured below.  It shows me the standard measurements of hammer-line, let-off, and even the backchecking distance.  It's invaluable!

The golden grand regulating tool.

Time to tune it to A-440! This is by far my favorite part of the process.

Beginning the tuning process.

K-52 (1982) Complete!

It's been about three weeks since I started work on this Steinway K-52.  There are a few reasons why it took so long, but after two jobs coupled with the difficulty of working on these particular models, it can take longer than expected.

Regardless of time and effort, here we see one of the final stages of regulation; key leveling.  

The final stages are somewhat arduous, yet at my level of technical skill (over 75 uprights and a few grands fully regulated!) the process is quite quick.  ​

If you're unsure of what regulation is, see this link here: ​

This is one of my most important tool boxes.  The colored "donut" shaped rings are named "punchings" which aid in the leveling of keys as well as the regulation of key dip (a.k.a. how deep the front of the piano key moves when pressed by a finger).  There are many different tools inside this tool box, but the punchings are a technician's best friend, for they can be used for many different applications when fixing a piano.

A first person view of key leveling.  This is what I see when leveling all of the natural keys on either an upright or grand piano.​

The final procedure! Enjoy my pride of three weeks of intermitted work!

Steinway K52 (1982)

This is the K52.  

"Introduced in 1903, this piano features a soundboard larger in area than many grand pianos, for a larger and more resonant voice. Height: 52" (132cm)" - Steinway & Sons

​The bass bridge had to be refinished, and one of my colleagues, Scott Peterson, completed that work.  He's a genius.

​Then I take everything out (case parts, stack, & keys) and vacuum, mar-away (see picture below), regulate (see photo below), and finally tune it to A-440.  

It's a long process (probably about 16 hours of monotonous (yet satisfying) work.   ​

​The Mar-away process is a crucial part in making a piano look it's best (so long as it's not a polish, which would then need to be waxed like a car).  It involves a very harsh chemical (use a face mask!), some fine steel wool, and rags to clean it up.  One is supposed to follow the grain of the wood with the steel wool for the best finish.